Welcome to our home!

But first, I guess we should go back to the before. We came home from our honeymoon as brand-new newlyweds and opened the front door to see this...

Ewwwwwwwwww.
Thankfully, we were crazy in love and didn't care what our house looked like just that it was our first home and we loved it!
Seriously, that was what you saw walking in the front door. There were giant glass sliding doors on all three sides of the courtyard. So, when you came in the front door you looked through sliding glass doors into the courtyard and then saw through the farther set of doors into the master bedroom. Yep. Not ok.
In addition to just being weird, all those glass doors were also horribly inefficient for heating/cooling purposes so one of the first major projects we took on that summer was removing all 3 sets of sliding doors and framing in normal walls/windows. (I'll show more of the master bedroom details in its own post). In the entry, we opted for a long window and I envisioned a window seat/bench below it from the very beginning. So I am pretty ecstatic that from that same point of view our entry now looks like this!


The door you can see on the right of that top picture leads to the garage. To the left of the entry are two hallways: one that makes a walkway behind the living room and is where the coat closet and coffee bar live, the other leading back to the bedrooms. Here is the view looking in from the living room.

As well as reframing that wall from a door to a window, we also re-textured and painted the walls, painted all the trim, added crown moulding, replaced the door to the garage, installed the wood floors and refinished the front door. The bench was a thrift store find that I refinished and added a cushion to. I'll post more details about that project soon. The light fixture was original with the house and we decided it wasn't bad enough to be worth replacing. If we live here long enough maybe somewhere down the line we will but for now we like it enough to live with it. I also hung curtains and added our little mail in/out box. We use that basket in the corner to store flip-flops and everyday shoes that get left by the door.

I've been on the hunt for baskets to add to the bench but haven't been able to find what I'm looking for. For now it is a handy place to stash my purse, the diaper bag, the library books and our pool bag.

And this just makes me happy. :)

There is still some work to do in the entryway, however. Some things that still need to be done are:
- Paint/stain the inside of the front door
- Paint the door leading to the garage
- Install threshold/seal under the garage door
- Get bigger/better rug for front door and garage door
- Finish touch-up paint on the crown moulding
- Possibly replace light fixture
- Get baskets for bench
- Possibly hang some hooks for guest's coats

This little "hall" is open to the living room on the front side and leads around to the kitchen/dining room (see the highchair in the distance).
It used to look like this...

This picture was taken from standing in the living room looking back, with the entry off to the right (look at those blue-green walls!) This was obviously originally intended to be used as a wet bar, a pretty staple feature of many homes built in the 70s. Since we didn't have any use for that we turned it into a place to store all of my coffee-loving husband's paraphernalia.
It looked like this for a bit while we were enduring our kitchen renovation.

But now it looks like this.


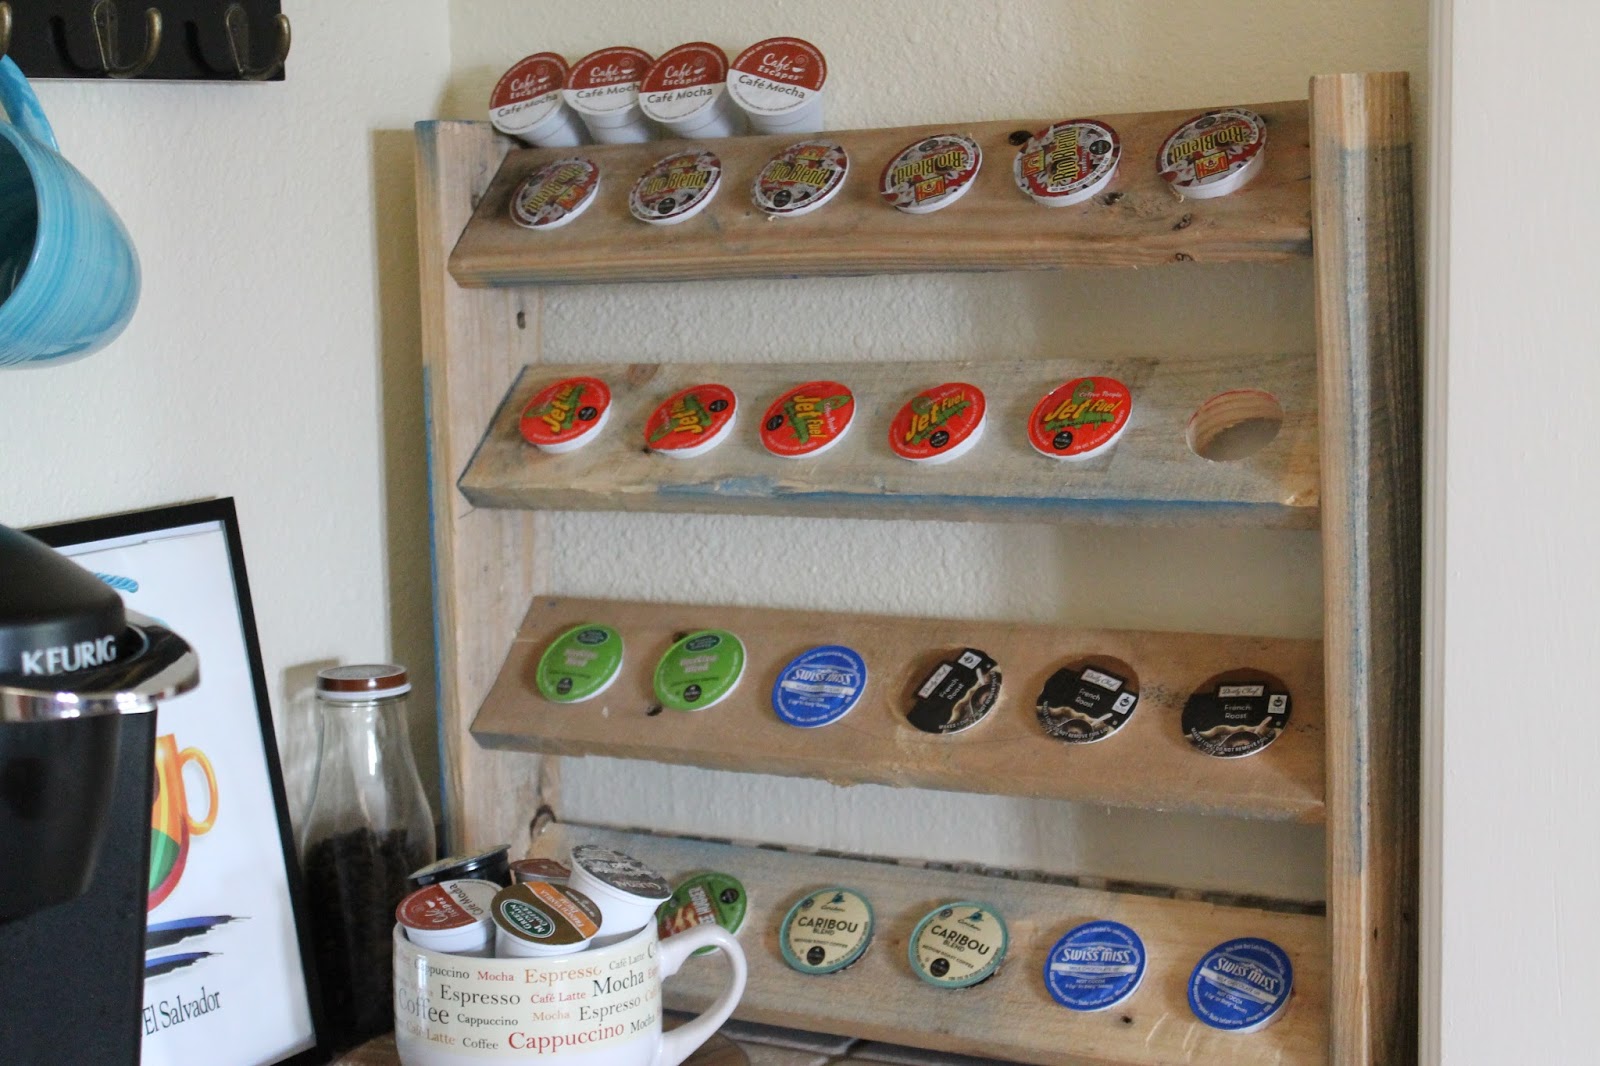
 |
| (Why I didn't take those 4 extra k-cups off the top BEFORE I took the picture I will never know) |


In here we painted walls and trim, tiled the countertop and backsplash, and painted the cabinets. Marcos made the k-cup holder out of a scrap pallet we had. I framed a souvenir bag we had brought home from El Salvador which has a special place in our hearts. And of course the "cafe do Brasil" coffee bean bag was kind of our starting point for this space. We would still like to potentially add some more shelving to get some of the stuff up off the counter but for now its a pretty happy little coffee spot.
Ok, moving on to the other hallway. This leads to the back part of the house where all the bedrooms are. When we first moved in the outside "wall" of this hallway was actually the big glass sliding doors so you could look out and see the courtyard. (thank goodness it doesn't look like that anymore!)


You can get a better view of the glass hallway from this picture - it is the doors you can see out the window to the left. Now, after framing in that wall and adding a normal exterior door instead, the view down the hall looks a little more hallway-ish.

The major accomplishments in here were texture, paint, and laying the flooring. I also used this space for a photo gallery wall which I LOVE. I even included a little spot to hang some of Elias' "artwork". It just uses a little mini-clothespin so I can swap it out whenever he creates something new. At just17 months he's not exactly churning out masterpieces, but he uses stickers and those dot paints and I am a proud momma who loves them. :)


So there ya have it. The new and improved versions of those small yet important spaces in our home.
More rooms to come soon!
No comments:
Post a Comment